One-Pan Garlic Butter Chicken With Rice
There’s something comforting about a meal that comes together in one pan. No juggling pots, no sink full of dishes—just chicken, rice, garlic, butter, and the kind of aromas that make everyone wander into the kitchen asking, “Is dinner almost ready?” This one-pan garlic butter chicken with rice is cozy, rich, and unbelievably easy. It’s the kind of recipe you keep in your back pocket for nights when you want real food but don’t want to fuss.
Why This Recipe Works So Well
There are a few quiet secrets behind why this dish tastes like you spent way more time than you actually did:
- It’s genuinely one pan. Chicken browns, garlic melts, rice cooks, everything finishes together.
- It’s ready fast. About 30 minutes from start to finish—sometimes less.
- It’s budget-friendly and flexible. Thighs, breasts, long-grain rice, short add-ins like spinach or peas—you can play around easily.
- It reheats beautifully. It’s one of those meals that tastes even better the next day.
And you know what? Even picky eaters usually say yes to garlic, butter, and chicken.
Ingredients You’ll Need
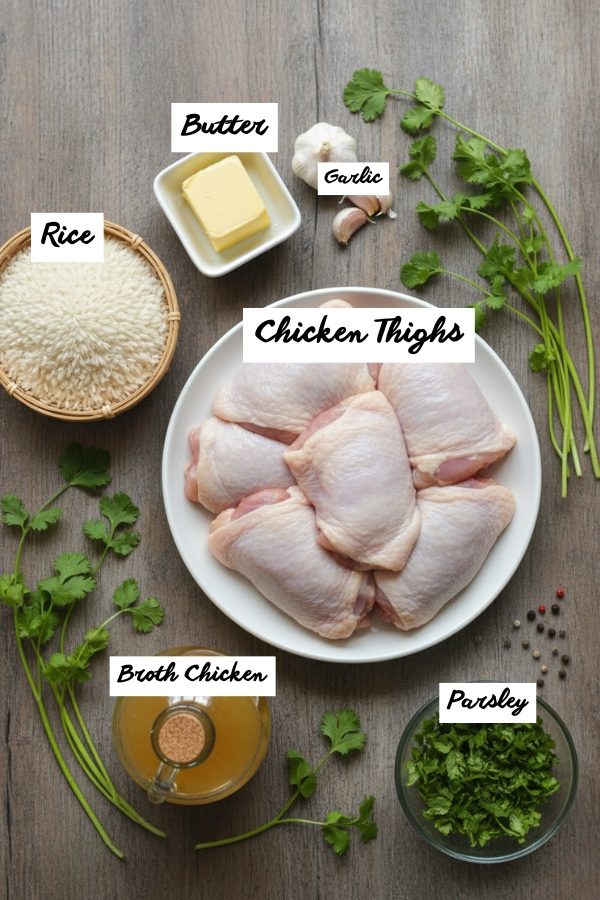
Chicken
- Boneless chicken thighs (juicy, reliable)
- Or chicken breasts (cook a bit faster; keep an eye on them)
- Salt, pepper, paprika or garlic salt
Rice & Liquid
- Long-grain white rice
- Chicken broth (low-sodium if you want more control)
- Optional: a splash of cream for richness
Garlic Butter Base
- Butter (of course)
- Fresh garlic—minced or grated
- Olive oil (helps keep the butter from burning)
Flavor Boosters (Optional but Great)
- Onion
- Spinach
- Lemon zest
- Red pepper flakes
- Fresh parsley
The beauty here is that none of these ingredients feel fancy or complicated—they’re regular things most of us already have.
Step-by-Step Instruction
Let me walk you through it in a way that feels practical, not rushed. Imagine someone standing next to you in the kitchen, pointing out the little things that matter.
Step 1: Season and Sear the Chicken
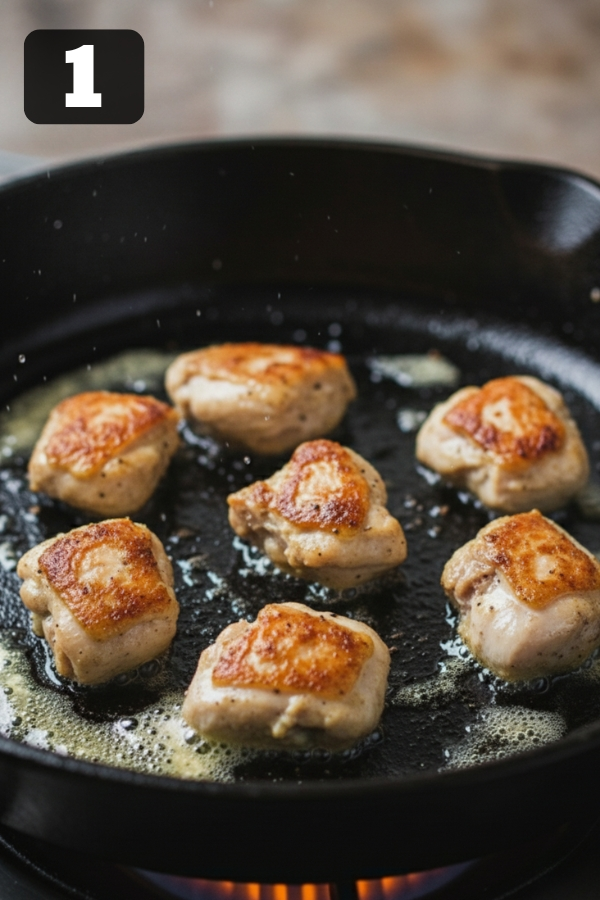
- Pat the chicken dry so it browns properly.
- Season both sides with salt, pepper, and paprika.
- Heat butter + oil in a pan over medium-high until it lightly shimmers.
- Lay the chicken in without crowding the pan.
- Sear 4–6 minutes per side until golden and fragrant.
- The smell of browning will hit before you even see the color—that’s when you know it’s working.
Step 2: Sauté the Garlic
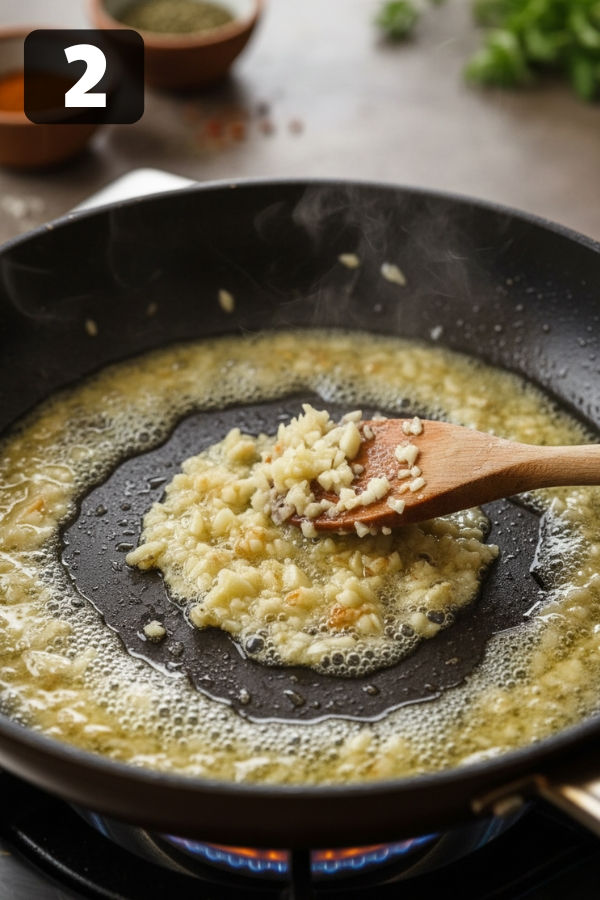
- Transfer the chicken to a plate and keep the browned bits in the pan.
- Add a small pat of butter if the pan looks dry.
- Stir in minced garlic for only 20–30 seconds.
- Cook until the garlic smells sweet and fragrant—not brown or bitter.
Step 3: Toast the Rice
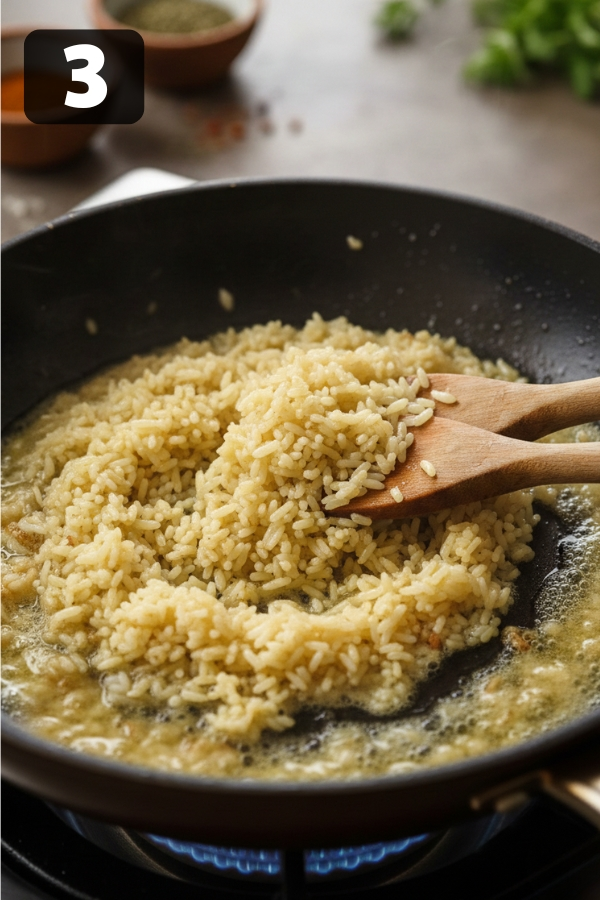
- Add the uncooked rice directly into the garlic butter.
- Stir for about 1 minute to coat each grain evenly.
- Rice should look glossy and smell slightly nutty.
- This step keeps the final dish fluffy, not mushy.
Step 4: Add Liquid & Simmer
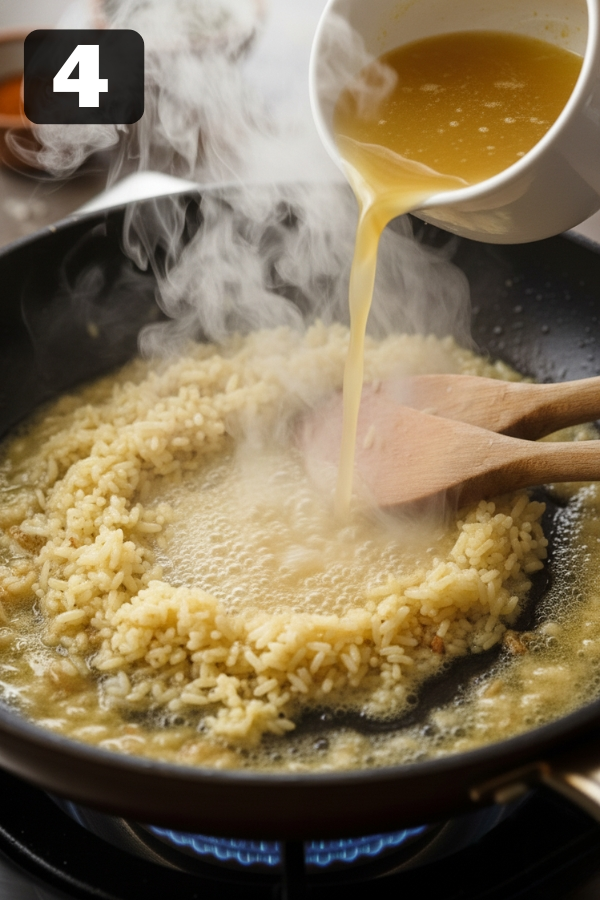
- Pour in the chicken broth slowly; let it loosen the browned bits on the bottom.
- Scrape gently so the flavor melts into the liquid.
- Bring to a gentle simmer.
- Lower heat, cover with a tight lid, and let the rice cook quietly.
Step 5: Add the Chicken Back
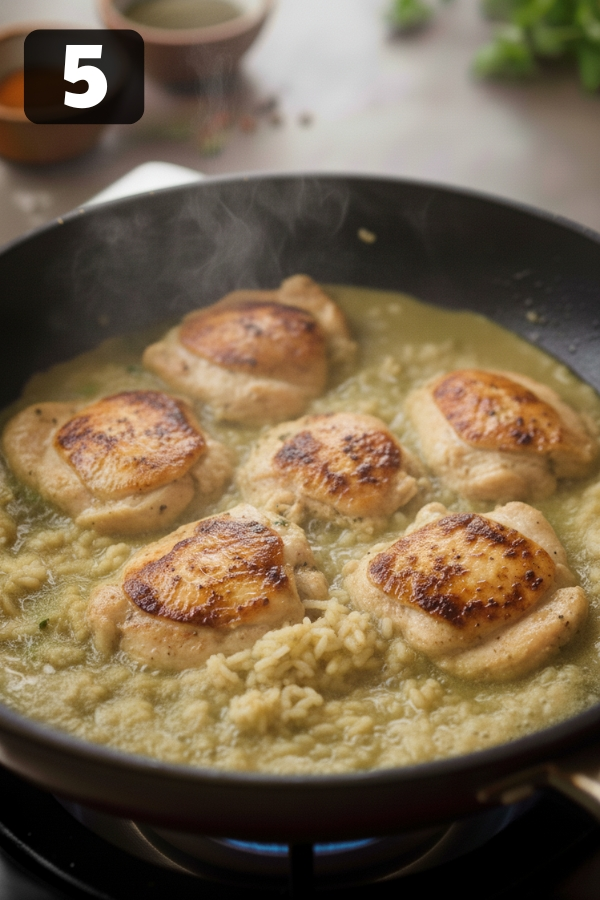
- Nestle the seared chicken pieces on top of the rice.
- Pour in any juices from the resting plate—they’re pure flavor.
- Cover the pan again.
- Cook until the rice is tender and the chicken is fully done (usually 12–15 minutes).
Step 6: Rest, Fluff, Finish
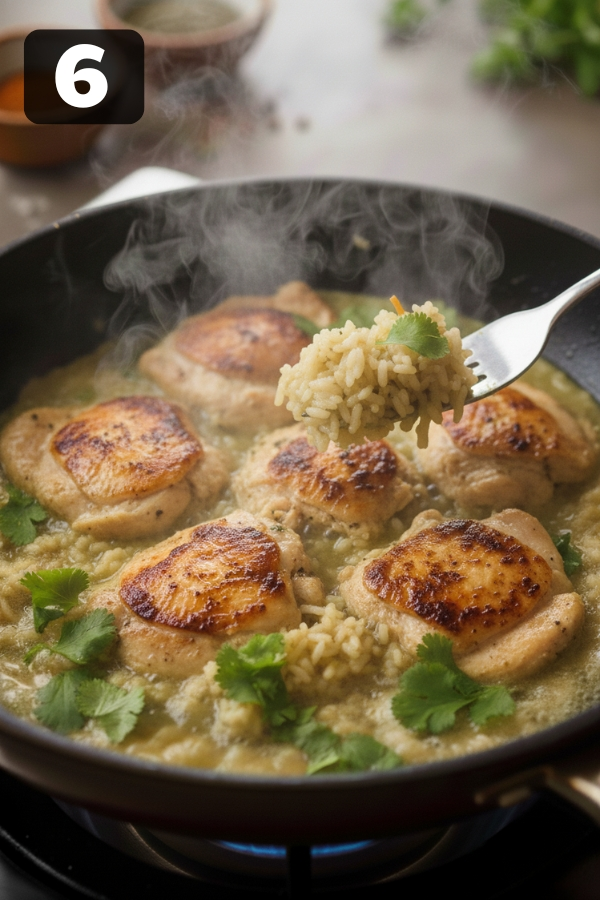
- Turn off heat but leave the lid on for 3–5 minutes.
- This rest helps the rice absorb leftover moisture.
- Fluff gently with a fork to lift the grains.
- Finish with chopped parsley or lemon zest for a bright, fresh finish.
Tips To Make It Even Better
- Don’t rush the sear. Browning = flavor.
- Use long-grain rice. Keeps the dish from going mushy.
- Don’t peek while rice cooks. Steam is your friend here.
- Add a vegetable. Peas, spinach, bell peppers—they all work.
- Use thighs if you want guaranteed juiciness. Breasts can dry out faster.
Storage & Leftovers
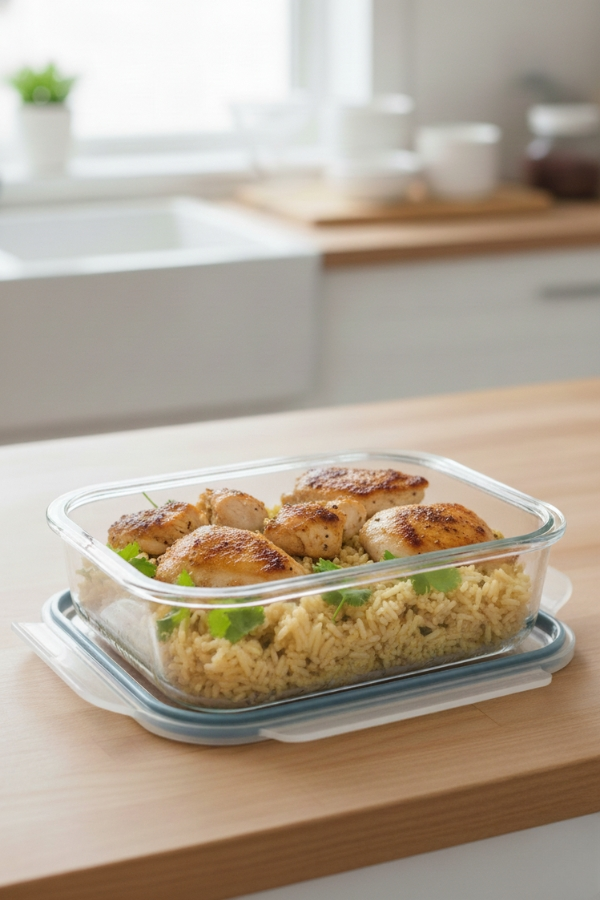
One of the best parts? Leftovers.
- Fridge (3–4 days): Store in an airtight container. The rice stays fluffy, and the chicken stays tender as long as it’s cooled properly before storing.
- Reheat (microwave or stovetop): Add a splash of broth or water to loosen the rice. Warm gently so the chicken doesn’t dry out. A quick stir halfway through helps bring the texture back.
- Freezer (up to 2 months): Works best without cream. Freeze in single portions for easy lunches. Thaw overnight in the fridge, then reheat with a bit of liquid.
And the flavor soaks even deeper into the rice overnight. It’s a nice little surprise in the middle of a busy week.
What Pairs Well With This Dish
You don’t need much, but a few sidekick ideas never hurt:
- A simple green salad with lemon dressing
- Steamed green beans or roasted broccoli
- A wedge of lemon on the side
- Chilled white wine (Sauvignon Blanc works beautifully)
This dish plays well with others but is satisfying on its own too.
FAQs
- Can I use brown rice?
You can, but it takes much longer and needs more liquid. Not ideal for a quick one-pan meal. - Can I use frozen chicken?
Yes—thaw fully first for even cooking. - Is this dish spicy?
Not really. Add red pepper flakes if you like a bit of heat. - Can I make it dairy-free?
Use olive oil or a dairy-free butter alternative.
Nutrition Snapshot (Estimated)
- Calories: ~450 per serving
- Protein: ~30g
- Carbs: ~42g
- Fat: ~17g
The numbers depend on variations—cream or no cream, thighs or breasts—but this gives you a sense of what you’re getting.
Quick Recipe Card
Prep Time: 10 minutes
Cook Time: 20–25 minutes
Total Time: ~30 minutes
Servings: 4
Ingredients:
- Chicken thighs
- Rice
- Garlic
- Butter
- Chicken broth
- Salt & pepper
- Optional veggies + parsley
Instructions:
- Season chicken & sear.
Season your chicken with salt, pepper, and paprika. Heat a pan with butter + oil until it shimmers. Sear the chicken for 4–6 minutes a side until golden.
- Sauté garlic in butter.
Move the chicken out, toss in more butter, and add garlic. Just 20–30 seconds—it burns fast. When the garlic smells sweet and fragrant, you’re good.
- Stir in rice.
Stir in the rice so each grain gets coated in garlic butter. This tiny step adds depth and keeps the rice fluffy.
- Add broth; simmer.
Pour in the broth. Bring everything to a gentle simmer, then lower the heat and cover.
- Nestle chicken back; cover.
Nestle the chicken on top of the rice. Any juices in the plate? Add them—they’re gold. Cover again and cook until rice is tender.
- Rest, fluff, and finish with parsley.
Turn off the heat and let everything rest for 3–5 minutes. Fluff the rice, add parsley or lemon zest, and you’re done.
Conclusion
If you keep recipes like this on hand, weeknight cooking starts to feel less like a chore and more like a small ritual—something warm and grounding to look forward to. This one-pan garlic butter chicken with rice delivers that mix of comfort and practicality that busy days call for. It’s simple enough for rushed evenings, yet flavorful enough to feel special. And once you’ve made it a couple of times, it slips right into your mental rotation of meals you can cook almost on autopilot. That’s the beauty of a dish that just works.

| Servings |
|
|
|
Instructions
- Step 1: Season and Sear the Chicken: Pat the chicken dry so it browns properly. Season both sides with salt, pepper, and paprika. Heat butter + oil in a pan over medium-high until it lightly shimmers. Lay the chicken in without crowding the pan. Sear 4–6 minutes per side until golden and fragrant. The smell of browning will hit before you even see the color—that’s when you know it’s working.

- Step 2: Sauté the Garlic: Transfer the chicken to a plate and keep the browned bits in the pan. Add a small pat of butter if the pan looks dry. Stir in minced garlic for only 20–30 seconds. Cook until the garlic smells sweet and fragrant—not brown or bitter.
- Step 3: Toast the Rice: Add the uncooked rice directly into the garlic butter. Stir for about 1 minute to coat each grain evenly. Rice should look glossy and smell slightly nutty. This step keeps the final dish fluffy, not mushy.
- Step 4: Add Liquid & Simmer: Pour in the chicken broth slowly; let it loosen the browned bits on the bottom. Scrape gently so the flavor melts into the liquid. Bring to a gentle simmer. Lower heat, cover with a tight lid, and let the rice cook quietly.
- Step 5: Add the Chicken Back: Nestle the seared chicken pieces on top of the rice. Pour in any juices from the resting plate—they’re pure flavor. Cover the pan again. Cook until the rice is tender and the chicken is fully done (usually 12–15 minutes).
- Step 6: Rest, Fluff, Finish: Turn off heat but leave the lid on for 3–5 minutes. This rest helps the rice absorb leftover moisture. Fluff gently with a fork to lift the grains. Finish with chopped parsley or lemon zest for a bright, fresh finish.


